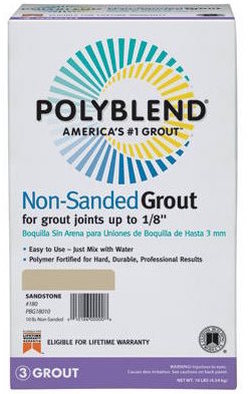
I'm not endorsing anyone's product here, just trying to point you in the right direction....
Stuff "like this" is what you are looking for.
Stuff "like this" is what you are looking for.
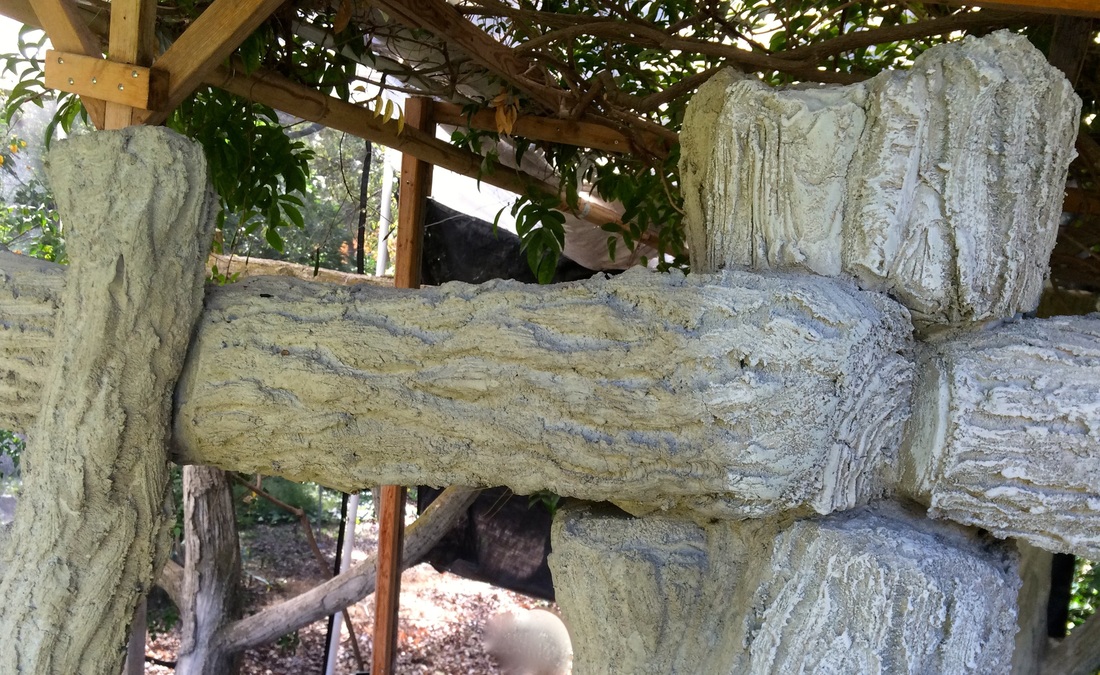
For restoring faux bois concrete, your first job is to treat the rusting steel.
This is after the decaying metal has been revealed by picking away the loose bits.
This is after the decaying metal has been revealed by picking away the loose bits.
1. Rust Conversion and Surface Preparation
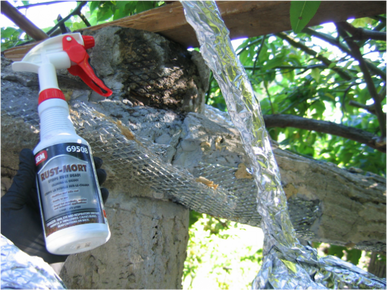
-First - you want to wash off the area with a scrub brush and hose it down with water. Let it dry completely. I suggest overnight.
-Next - !! BE CAREFUL !! SUIT UP !! protective gloves, respirator, goggles....This is NASTY stuff!
- You want to use some brand of Phosphoric Acid based metal treatment that converts rust into iron phosphates.
-This is a pretreatment for rusting metal before priming with paint.
- Here I'm using SEM 69508 Rust-Mort
- Suppliers for auto body shops will have something like this.
- It contains some denatured alcohol or other fast solvent to help it penetrate into the metal.
I'm using kitchen foil, plastic film, and cardboard to mask the plant material.
I wet the area around the decay with a mist of water.
This keeps the bleaching effect of the acid from staining good concrete.
This is also a really good cleaner for the now prepared area to be fixed.
I wet the area around the decay with a mist of water.
This keeps the bleaching effect of the acid from staining good concrete.
This is also a really good cleaner for the now prepared area to be fixed.
Arrest the Rust
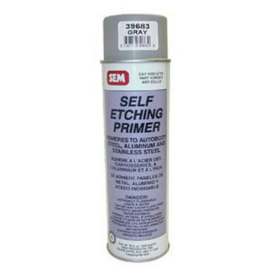
SEM 39683 Self Etching Primer - Gray
-an acidic primer paint that penetrates metal
-Provides excellent adhesion on steel, aluminum
and stainless steel
You may find something else that says "cold galvanize" or an aerosol can of metal primer that feels heavier than normal.
That's a good thing. You are adding zinc and other metals to "arrest" the rust so it doesn't continue inside the structure after your repairs.
2. Replacement of metal mesh in decaying areas
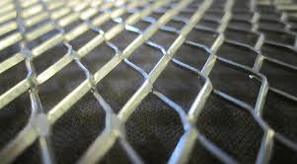
- Galvanized steel expanded metal mesh.
- Commonly called "diamond lath", it is used for stucco work and can easily be shaped.
- Available in different weights, the lightest weight forms most easily.
- Cut with metal shears - wear leather gloves for safety
- Commonly called "diamond lath", it is used for stucco work and can easily be shaped.
- Available in different weights, the lightest weight forms most easily.
- Cut with metal shears - wear leather gloves for safety
This corrosion resistant support mesh allows me to be sure that I leave no voids in the mortar.
These voids could later become traps for water as the concrete absorbs moisture.
These voids could later become traps for water as the concrete absorbs moisture.
3. Mortar Application
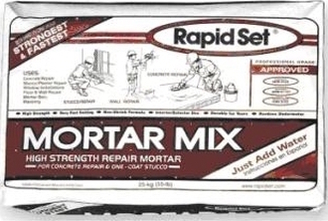
Rapid Set "Mortar Mix"
- A high performance blend of hydraulic cement and quality sand
- Coarse sand, easily "pushes through" the mesh until there are no air voids
- This product hardens very quickly.
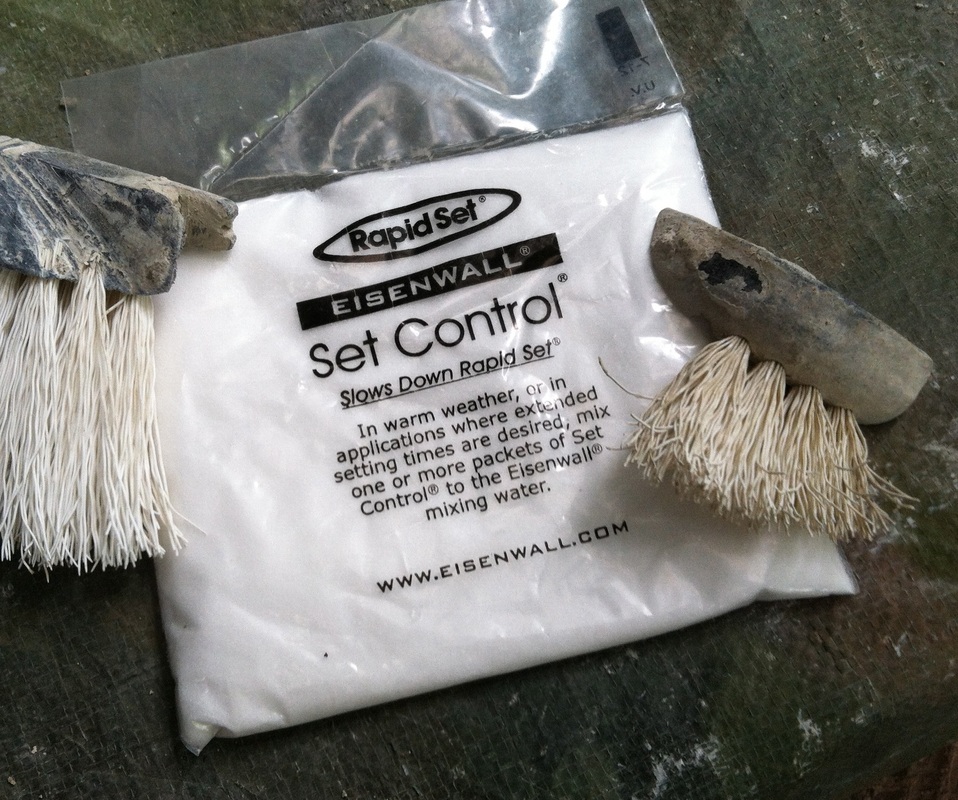
- The use of Rapid Set "Set Control" retarder is normally required to allow time to work with this product.
- A high performance blend of hydraulic cement and quality sand
- Coarse sand, easily "pushes through" the mesh until there are no air voids
- This product hardens very quickly.
- The use of Rapid Set "Set Control" retarder is normally required to allow time to work with this product.
"Set Control" looks like sugar packets in a box on a shelf above the sacks at the store.
Using their Set Control and an acrylic admixture instead of water slows it down substantially.
Using their Set Control and an acrylic admixture instead of water slows it down substantially.
Mixing dry components with acrylic admixture in place of water improves the bond
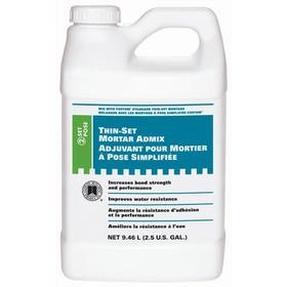
Thin-Set Mortar Admix
- A liquid acrylic polymer additive for mortar bed mixes.
- Used in place of water, it improves mortar's bond strength and flexibility.
- Can be used undiluted. This has enough water in it to make the cement work.
- Made by Custom Building Products for the tile industry.
- A liquid acrylic polymer additive for mortar bed mixes.
- Used in place of water, it improves mortar's bond strength and flexibility.
- Can be used undiluted. This has enough water in it to make the cement work.
- Made by Custom Building Products for the tile industry.
You'll have to go to the "tile isle" to find this.
They don't keep it with the mortar or cement.
They don't keep it with the mortar or cement.
4. Sculpt
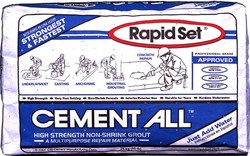
Rapid Set "Cement All" Grout
- It is commonly used for cast concrete products like garden gnomes, cats or birdbaths from molds.
- It is similar to products used for the Decorative or Custom Concrete Countertop industry.
- It is a "pudding" texture when properly mixed. Chilled, it is like sculpting with soft ice cream.
- Rapid Set "Set Control" retarder is required as this product normally hardens very quickly.
Grout is mortar with a finer sand. DO NOT USE PLAIN CEMENT!
Cement needs something to bind with called aggregate. Cement is the "glue" that makes concrete.
Highway concrete mixes use gravel, brick layers use sand to make mortar.
Tile setters glue with "thin-set" mortar beds and finish with grout containing fine sand reduced almost to a powder .
NONE OF THESE PRODUCTS ARE CEMENT ALONE!
Using pre-blended sack mixes saves your lungs from mixing the powders yourself and gives you a proper blend.
- I use this product chilled so that it is curing substantially slower than normal.
- I've made the mix last all afternoon on a hot day with an occasional massage of the of the pastry bags while they are kept in ice.
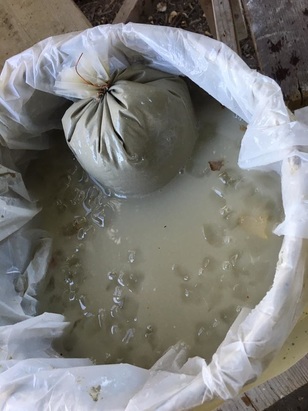
- You will want to make something to hold the pastry bags While you fill them. I use a large tall can weighted at the bottom with a concrete base and fold the top of the bag over the empty can.
Place a handful of ice into an empty bucket, add some Set Control and then the Acrylic Admix. Slowly add the powder from your sack mix into the bucket and stir with a mortar paddle using a strong drill, or mix by hand in a bowl like you're making cookie dough. When it is the consistency of pudding and the product does not cling to your gloves, it is ready to apply. Place the mixed product into disposable pastry bags and close the wide end using fine florist wire or some copper motor winding wire. Twist the small end closed and place them in iced water. This slows hardening of the mix and gives more time to work with it.
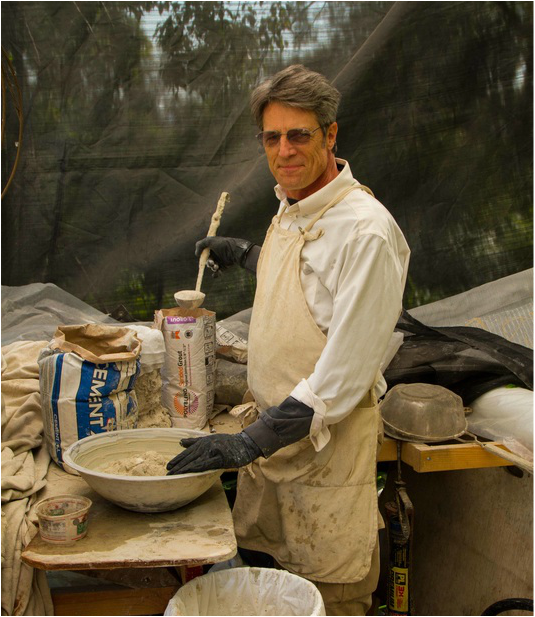
Here, I am hand mixing in some colored sanded grout to the structural (blue bag) grout to change its natural color toward the color of the original 100 year old concrete.
Shade cloth is keeping my mess contained and prevents spatters of mud from landing on plants nearby.
My pastry bag stand is between the two sacks of grout. The bags, one inside another, ....inside another...inside another, have their tops folded open over the stand and are easy to fill and then close with fine wire.
I line all my water buckets with trash bags so I can pour off the water the next day and lift out the previous days' sediment. I can use the same bucket daily for years, and collect all my waste mud while I work in a garden and not leave a mess.
5. Bark Detail Tool
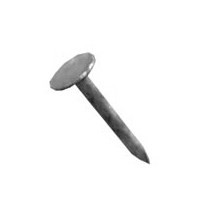
The roofing nail
You really should read the "Step by Step" page to see how I use this as a sculpting tool.
You really should read the "Step by Step" page to see how I use this as a sculpting tool.
6. Matching the color of old concrete
- There are many choices of colors.
- I use #382 Bone which best matches the lightest tones of the original sculpture.
- mix the colored grout with acrylic admixture into a paint like "slurry".
This is used to achieve the "right" color for your last sculpted layer of grout.
This is where it gets a little tricky. You are trying to match what the old work looks like when it is wet from a mist of water.
After my new work has been color-stained to darken it with mists and spatters of very watery washes of brown (umber) acrylic paint and simulate "age".
I use this to highlight the stained work by using a "dry brush" technique in order to bring the lightest colors back.
Going back and forth with thin watery stains to darken, and then the slurry to highlight, creates the aged effect that will match the surrounding untouched 100 year old sculpture.
Going back and forth with thin watery stains to darken, and then the grout slurry to highlight, makes the effect of age that is needed to match the surrounding untouched 100 year old sculpture.
Below, new sculpture is stained on the left then highlighted on the right.
Another spatter, or wash of stains can follow this to make more subtle tones.
Below, new sculpture is stained on the left then highlighted on the right.
Another spatter, or wash of stains can follow this to make more subtle tones.